Heart Rate Zones Explained: Understanding the Display
Learn how heart rate zones work, what each zone means, and why visual heart rate displays help you train smarter, improve performance, and stay safe during workouts.

If you have ever looked up at a gym display or down at your fitness watch during a workout and seen a spectrum of colors, you were seeing heart rate zones in action. These zones are not just visual indicators - they are one of the most effective tools for understanding workout intensity, effort, and overall training effectiveness.
By learning how heart rate zones work, you can train with intention rather than guesswork. Instead of relying on perceived exertion alone, heart rate zones provide real-time, personalized feedback based on your physiology.
What Are Heart Rate Zones?
Heart rate zones divide exercise intensity into defined ranges based on a percentage of your maximum heart rate (MHR). Each zone represents a different level of cardiovascular stress and delivers distinct training benefits.
Most modern fitness platforms and group training systems, including Fit Viz displays, use a standardized five-zone heart rate model. These heart rate zones are typically shown as a color-coded line or spectrum that updates continuously throughout your workout.
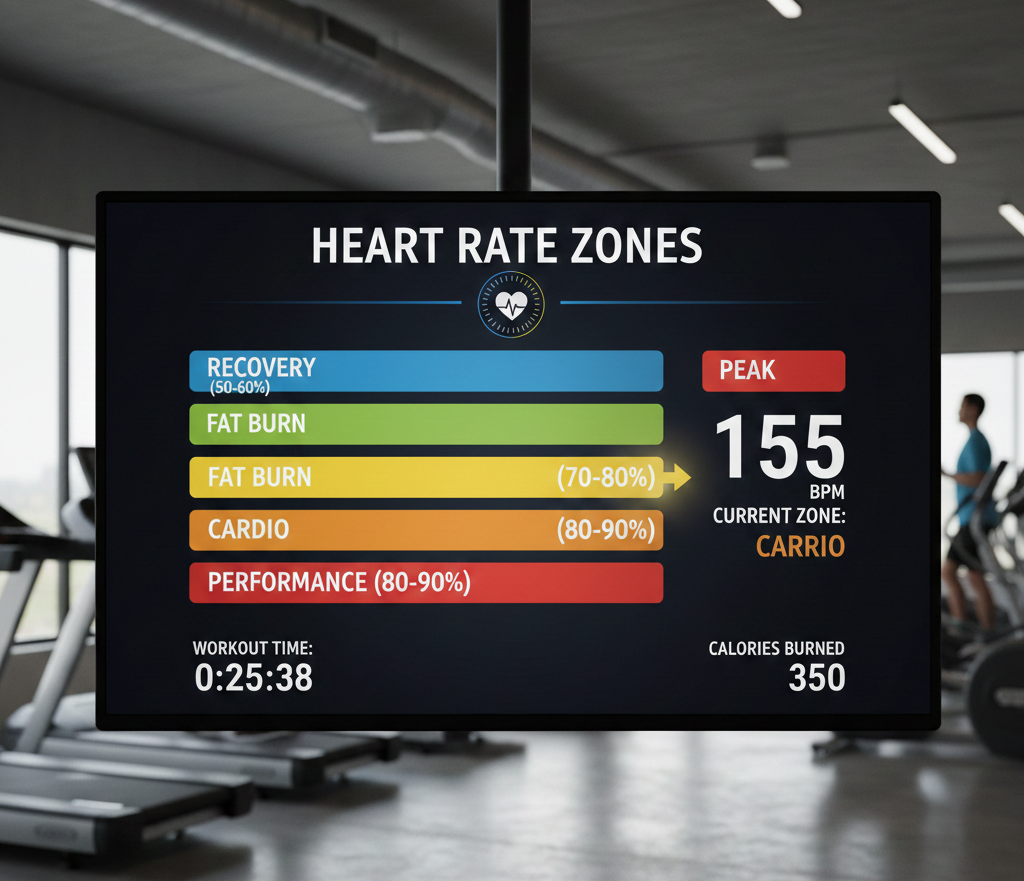
The 5-Zone Heart Rate System Explained
Zone 1: Warm-Up Zone (50–60% MHR)
Common Colors: Grey or Blue
Zone 1 is the foundation of every effective workout. In this heart rate zone:
- Blood flow gradually increases
- Muscles and joints prepare for movement
- Cardiovascular strain remains low
This zone is ideal for warm-ups, cooldowns, and recovery sessions. Spending time in Zone 1 helps reduce injury risk and improves overall workout quality.
Zone 2: Endurance and Fat Burn Zone (60–70% MHR)
Common Color: Blue or Green
Zone 2 is often referred to as the fat burn or endurance heart rate zone. In this range:
- You can comfortably hold a conversation
- The body primarily uses fat as fuel
- Aerobic capacity and stamina improve
This heart rate zone is essential for building a strong cardiovascular base and is commonly used in steady-state cardio and longer workouts.
Zone 3: Aerobic Training Zone (70–80% MHR)
Common Color: Green or Yellow
Zone 3 is where workouts become more demanding. In this heart rate zone:
- Breathing becomes deeper and more frequent
- Cardiovascular efficiency improves
- Calorie expenditure increases
Many fitness professionals consider Zone 3 the “sweet spot” for improving overall fitness. Heart rate zones make it easy to identify when you are working hard enough to see progress without overtraining.
Zone 4: Threshold Zone (80–90% MHR)
Common Color: Yellow or Orange
Zone 4 represents high-intensity effort. In this heart rate zone:
- Speaking becomes difficult
- Lactic acid begins to accumulate
- Performance thresholds improve
Training in Zone 4 increases your ability to sustain higher intensities and is commonly used in interval training and performance-focused workouts.
Zone 5: Maximum Effort Zone (90–100% MHR)
Common Color: Red
Zone 5 is the highest and most demanding heart rate zone. It is:
- Sustainable only for short bursts
- Designed to improve speed, power, and peak output
- Highly taxing on the cardiovascular system
This zone is used sparingly and strategically, often during sprints or explosive intervals.
Why Visualizing Heart Rate Zones Matters
Seeing heart rate zones displayed visually during a workout changes how people train. Instead of comparing speed, weight, or appearance, effort becomes relative and individualized.
On shared gym displays:
- A beginner and an advanced athlete can train side by side
- Both participants may occupy the same heart rate zone despite different workloads
- Effort is measured by internal response, not external performance
This equalization of effort creates a more inclusive, motivating, and safer training environment.
Heart Rate Zones in Group Training
In group fitness settings, heart rate zones enhance:
- Instructor coaching clarity
- Participant motivation through real-time feedback
- Safety by discouraging overexertion
Platforms like Fit Viz transform heart rate zones into a live, shared visual experience. This helps participants self-regulate intensity while allowing coaches to guide the room more effectively.
Training Smarter With Heart Rate Zones
Understanding heart rate zones allows you to:
- Align workout intensity with specific goals
- Recover more efficiently
- Avoid burnout and injury
- Track progress objectively over time
Instead of pushing hard in every session, heart rate zones teach when to push and when to recover - an essential balance for sustainable fitness and long-term results.
Conclusion
Heart rate zones convert invisible internal effort into clear, actionable insight. The color-coded display on your watch or gym screen represents how your body is responding in real time.
By understanding and using heart rate zones effectively, you can train with purpose rather than guesswork. Whether training solo or in a group environment powered by Fit Viz, heart rate zones ensure every participant works at the right intensity for their body - maximizing results while staying safe.